")

Introduction
Are you looking at Instagram and thinking that those beautiful gallery walls are too expensive for you? Think again! Your local Dollar Tree is full of affordable items that can turn into stunning wall decor. You can impress your guests with pieces that look like they came from an expensive store, all for just $1.25.15+ Stunning Dollar Tree Wall Decor Ideas.
Table of Contents
Whether you’re a college student decorating your first apartment, a budget-conscious homeowner, or someone who enjoys DIY projects, these 15+ Stunning Dollar Tree wall decor ideas will transform your space without costing much. You can create beautiful gallery walls or textured panels that resemble costly architectural designs. Designer style is within your reach. Ready to make your plain walls into art? Let’s get started!
Why Dollar Tree Is Your Secret Weapon for Designer Wall Decor
Dollar Tree has changed a lot from what it used to be. Now, it’s a wonderful place for home décor lovers. You can find stylish items for just $1.25 each. This lets you try out new styles without spending a lot and create pieces that show off your personality.
You can mix and match items, add your own touches, and follow simple design rules. That plain black frame can become part of a stylish gallery wall. Those round mirrors can turn into a trendy sunburst design. The trick is to see possibilities where others see plain items.If you’re looking for even more ways to recreate high-end home decor using only Dollar Tree items, you’ll find that the possibilities are truly endless.
The Psychology Behind High-End-Looking Decor
Interior designers understand that you can make a space look expensive without spending a lot of money. To achieve this, you can use a few simple principles. First, symmetry creates balance and shows thoughtful design. Second, color coordination can bring together different items, making them look more like a set. Third, adding texture gives depth and makes a room feel more sophisticated. Finally, proper spacing keeps things from looking cluttered and creates a comfortable atmosphere.
When you apply these tips to items from Dollar Tree, you are using the same strategies that high-end designers use, but on a smaller budget. This approach leads to well-coordinated walls and spaces that feel intentionally designed, rather than decorated randomly.
Essential Supplies You’ll Need from Dollar Tree

Before you start any project, stock up on these versatile staples that form the foundation of countless wall decor ideas:
Frames: Black, white, and natural wood frames in various sizes (4×6, 5×7, 8×10). Look for matching sets or complementary styles.
Mirrors: Small round mirrors, square mirrors, and rectangular options. These are goldmines for creative projects.
Adhesive Solutions: Command strips (yes, Dollar Tree carries them!), mounting tape, and adhesive hooks. These protect your walls while providing secure hanging.
Craft Supplies: Foam boards, poster boards, craft sticks, wooden dowels, spray paint (seasonal availability), and hot glue sticks.
Decorative Elements: Faux florals, artificial greenery, decorative paper, scrapbook paper, and ribbon.
Hardware: Picture hanging kits, nails, and small sawtooth hangers.
Pro Shopping Tip: Visit Dollar Tree on weekday mornings for the best selection, and don’t be afraid to check multiple locations. Inventory varies by store, and you might find different frame styles or colors at different branches.explore these 10 easy Dollar Tree crafts that can complement your wall decor projects.
Stunning Dollar Tree Wall Decor Idea #1: Gallery Wall Mastery
Gallery walls are the ultimate designer look, and they’re surprisingly achievable with Dollar Tree frames. The key is creating cohesion among different pieces so they read as one unified installation rather than random frames scattered on a wall.
Choosing Your Color Palette
Start by selecting 2-3 colors that complement your room. The most foolproof approach is using all black frames, all white frames, or all natural wood frames for instant cohesion. For a more dynamic look, try a two-tone combination: black and gold, white and natural wood, or black and white. Stick to your chosen palette religiously—this consistency is what makes budget frames look intentional and expensive.
Layout Planning Before You Hang

This step is essential for professional results. Lay all your frames on the floor and try different arrangements. Choose a symmetrical grid for a formal look or an asymmetrical salon style for a more eclectic feel.
Take a photo of your favorite layout—this will guide you when hanging the frames. Use painter’s tape to mark where each frame will go on your wall before you drill any holes. The center of your arrangement should be 57-60 inches high, which is the standard eye-level height used in museums.
Styling Tips for Magazine-Worthy Results

Dollar Tree frames are great for displaying art and photos. You can print high-quality pictures or find free artwork on websites like Unsplash or Rawpixel. Use Dollar Tree’s white poster board to create DIY mats—just cut the board to fit around smaller prints, and this will improve their appearance. Leave 2-3 inches between frames to give them some space.
To create a dynamic display, mix different frame sizes—use 8x10s along with 5x7s and 4x6s. Add 1-2 larger frames as focal points. For a creative touch, take the glass out of 1-2 frames and replace the prints with textured scrapbook paper or fabric for added depth.
Stunning Dollar Tree Wall Decor Idea #2: DIY Textured Wall Panels
These architectural-looking panels mimic expensive wainscoting or decorative molding but cost under $10 to create. They add incredible dimension to any wall and photograph beautifully.This project is perfect for anyone exploring Dollar Tree DIY home decor projects that make a major visual impact
Materials and Preparation
You will need foam boards (about 20×30 inches), thin wooden craft sticks or decorative trim pieces, white acrylic paint, a hot glue gun, and Command picture hanging strips. To create one large panel (about 24×36 inches), plan to budget around $8-10 for supplies.
First, clean your foam boards and choose a pattern. Geometric designs work well—consider rectangles within rectangles, hexagons, or modern linear patterns. Lightly sketch your design in pencil before you start.
Assembly Instructions

1. Arrange craft sticks or trim pieces on your foam board based on your chosen pattern. Start at the outer edges and move inward to keep everything balanced.
2. Use hot glue to attach each piece securely, working in small sections. Wait 30 seconds for the glue to set before adding the next piece.
3. Once your design is complete and the glue has dried (about 30 minutes), paint everything in one color. White or cream gives a classic, architectural look. Apply two coats for full coverage. Allow it to dry completely (2-4 hours) before hanging.
4. Use heavy-duty Command strips rated for the weight to mount the panels. These panels are lightweight, making them ideal for renters or anyone who wants to avoid damaging walls. For a stronger effect, create a set of 2-4 panels.
Stunning Dollar Tree Wall Decor Idea #3: Mirror Magic Installations
Dollar Tree’s small mirrors are perfect canvases for trendy mirror projects that typically cost $50-100 in stores. With multiples of the same mirror style, you can create installations that look custom-designed.
Sunburst Mirror Tutorial
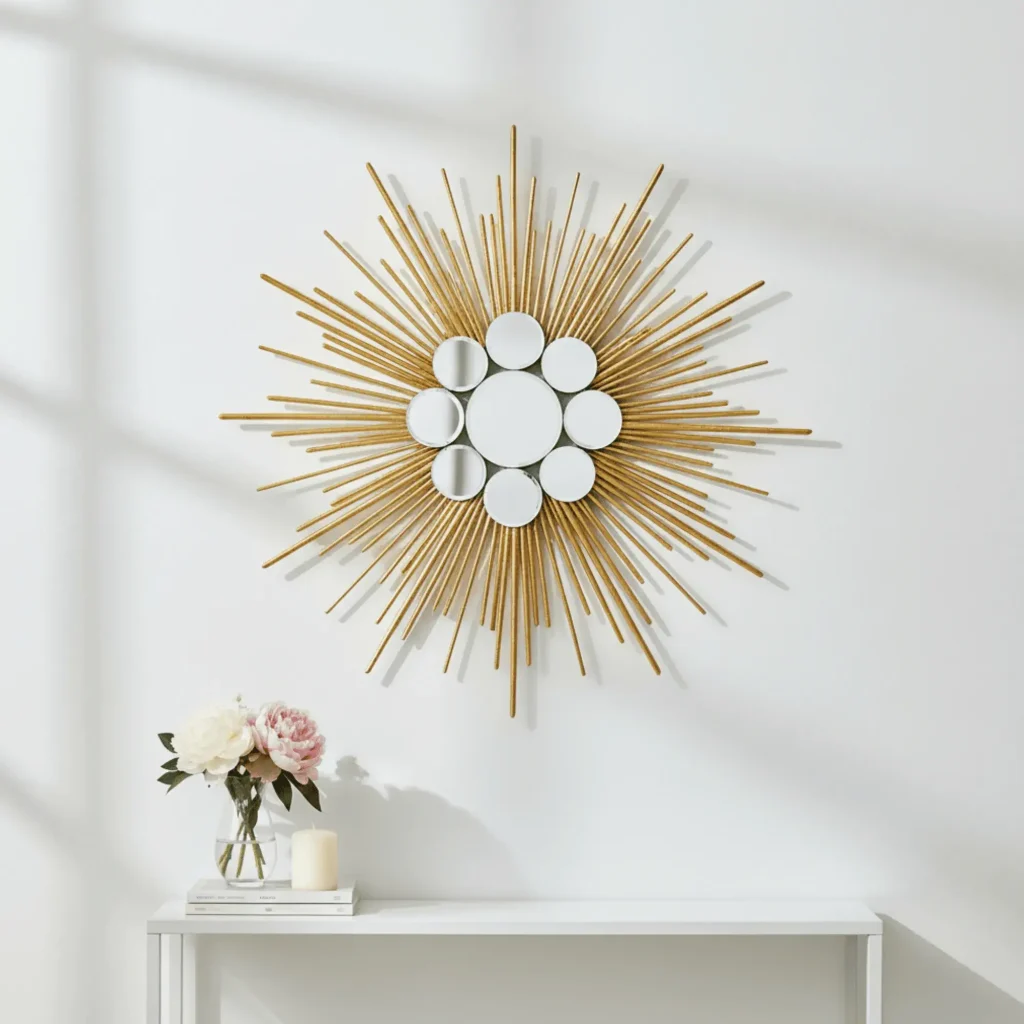
This popular project uses 10-15 round mirrors from Dollar Tree that are all the same size and wooden skewers or craft sticks. You will also need gold or silver spray paint, a hot glue gun, and a large cardboard circle as your base.
First, cut the skewers or sticks to different lengths (8-12 inches) for added depth. Arrange them in a sunburst pattern on your cardboard base, mixing shorter pieces with longer ones. Glue them securely in place and consider making two layers for more dimension. Spray paint the entire piece in your chosen metallic color.
After it dries, place the small mirrors in a circle at the center, overlapping them slightly. Glue each mirror firmly. This project creates a striking piece that looks like it could cost ten times more. The total cost is around $15-20.
Geometric Mirror Clusters

To create a modern and abstract look, arrange 9-12 identical mirrors in a geometric pattern on your wall. You can use a honeycomb pattern with hexagonal mirrors, a grid of squares, or a diagonal arrangement. Use adhesive mounting squares to hang them securely without damaging the wall.
Using the same type of mirror multiple times creates a stylish effect. This arrangement works well in entryways, above consoles, or in bathrooms where you want extra reflection. Keep a consistent space of 1-2 inches between mirrors for a polished appearance.
Stunning Dollar Tree Wall Decor Idea #4: Floating Shelf Displays
Dollar Tree shelves themselves might be basic, but how you style them creates the designer magic. The key is curating items with intention rather than randomly placing things.
Shelf Styling Formula

Use the “rule of odds” by grouping items in threes or fives. Vary heights by using stacked books, small risers, or items of different sizes. Create a color scheme by using 2-3 colors that match your room.
Layer items by placing taller ones in the back and shorter ones in the front. Include different textures, like smooth ceramics, natural wood, and metallic accents. Leave some empty space—don’t fill every inch. A bit of empty space makes displays look more expensive and well put together.
A good shelf display could include a small framed print leaning against the wall, a faux succulent in a simple pot, and a decorative object or a small stack of matching items. The total cost would be around $3.75-6.25.
Seasonal Rotation Ideas
Keep your walls feeling fresh by rotating shelf styling with the seasons. Spring calls for faux florals, pastels, and botanical prints. Summer embraces bright colors, beach-inspired elements, and light, airy arrangements. Fall introduces warm tones, mini pumpkins, and rustic textures. Winter features metallics, evergreen touches, and cozy elements.
Store off-season items in labeled bins so you can easily swap things out every few months. This approach keeps your decor feeling current without requiring a complete overhaul.
Stunning Dollar Tree Wall Decor Idea #5: Faux Botanical Wall Art
Bringing the outdoors in is a timeless design trend, and Dollar Tree’s artificial plants make it incredibly affordable. These organic touches add life and freshness to any wall.
Pressed Flower Frame Tutorial

Select faux flowers with relatively flat blooms—daisies, cosmos, and simple five-petal flowers work beautifully. Carefully separate petals and leaves from stems. Arrange them artfully inside a Dollar Tree frame (remove the glass), creating compositions that mimic expensive pressed flower art.
Use white or cream cardstock as your background. Secure flowers with tiny dots of clear-drying craft glue. Replace the glass and backing. Create a series of 3-5 frames with different flower arrangements for a cohesive botanical gallery. Each frame costs $1.25, making a set of five just $6.25.
Eucalyptus Wall Hanging
Dollar Tree often carries faux eucalyptus stems, which are perfect for minimalist wall hangings. You’ll need 3-5 stems, twine or ribbon, and a small dowel or stick (found outdoors or purchased).
Trim eucalyptus to desired length, and bind stems together at the top with twine, creating a simple bundle. Attach it to your dowel using the same twine, leaving extra length for hanging. This simple, organic piece works perfectly above beds, in bathrooms, or flanking larger art pieces. Cost: approximately $ 5.
Stunning Dollar Tree Wall Decor Idea #6: Typography and Word Art
Custom quote art sells for $30-100 in stores, but you can create your own versions for a fraction of the cost using Dollar Tree frames and some creative techniques.
Transfer Techniques for Professional Lettering
Print your chosen quote or phrase in a beautiful font (try free fonts from Google Fonts or DaFont). Place the printed paper face-down on your background surface (poster board, canvas board, or directly on the frame backing). Rub firmly with a credit card edge to transfer the toner onto your surface.
Alternatively, use the graphite transfer method: cover the back of your printed text with pencil graphite, place it right-side up on your surface, and trace over the letters. Then go over the transferred outline with a paint pen or fine brush.
Choose meaningful quotes, song lyrics, or single impactful words. Simple, clean fonts look most professional. Frame in Dollar Tree frames for instant wall art that’s deeply personal.
Pro Styling Secrets That Make Budget Decor Look Expensive
Now that you have specific project ideas, let’s talk about the finishing touches that separate DIY projects from designer-looking installations.
Hang at Proper Heights: Art should be at eye level (57-60 inches to the center). This single adjustment makes everything look more professional.
Use Quality Hardware: Invest in a basic level and proper picture-hanging hooks. Crooked art screams “budget,” while perfectly aligned pieces signal intention.
Group Strategically: Odd numbers (3, 5, 7) are more visually appealing than even numbers. Create triangular sight lines with your arrangements.
Mind the Scale: Art should fill 2/3 to 3/4 of the wall space or furniture width beneath it. Too-small art looks lost; properly scaled art looks intentional.
Add Lighting: Battery-operated picture lights or strategically placed lamps dramatically elevate your displays by adding depth and emphasis.
The Power of Repetition
Repetition is a designer’s secret weapon. Instead of one Dollar Tree mirror, use twelve in a pattern. Rather than a single frame, create a series. This multiplication transforms individual budget items into substantial installations that command attention.
Repetition also reinforces your design choices, making them appear purposeful rather than random. When viewers see the same element repeated, their brain registers “cohesive design” rather than “random assortment.”
Finishing Touches That Matter
Small upgrades make big differences. Spray paint mismatched frames in unified colors. Replace cheap-looking hardware with upgraded hanging systems. Add texture with fabric backings or decorative papers behind glass. Use museum putty to keep frames perfectly level.
Consider the wall color behind your decor—a fresh coat of paint in a complementary shade makes everything pop. Even renter-friendly peel-and-stick wallpaper on one accent wall elevates your entire display.
Common Mistakes to Avoid
Even with the best Dollar Tree finds, these pitfalls can undermine your efforts:
Hanging Too High: The most common mistake. Remember the 57-60 inch rule for center points.
Overcrowding: More isn’t always better. Leave breathing room between pieces and around groups.
Ignoring Scale: Tiny frames on a huge wall look lost. Size your art appropriately for the space.
Clashing Colors: Stick to your chosen palette. Random colors create chaos rather than cohesion.
Skipping the Planning Phase: Measure twice, hang once. Those extra holes in your wall are permanent reminders of impatience.
Using Obvious Dollar Store Items: Transform pieces with paint, paper, or creative arrangements. The goal is to make them unrecognizable as budget finds.
Forgetting About Balance: Distribute visual weight evenly. Don’t cluster all dark or large pieces on one side.
Room-by-Room Application Guide

Living Room: Create a large gallery wall as a focal point above the sofa (7-9 frames). Add floating shelves on flanking walls with styled vignettes. Consider a statement mirror piece opposite windows to maximize light.
Bedroom: Install textured panels as a faux headboard. Hang eucalyptus bundles on either side. Add typography art with meaningful quotes above nightstands.
Bathroom: Geometric mirror clusters add function and style. Small floating shelves hold styled toiletries. Botanical prints in moisture-resistant frames bring spa vibes.
Entryway: Make strong first impressions with a sunburst mirror as a centerpiece. Add a floating shelf below for keys and styled decor. Flank with matching frames containing seasonal prints.
Home Office: Gallery walls of inspirational quotes keep you motivated. Textured panels add architectural interest without distraction. Mirrors strategically placed make small offices feel larger.
Transform Your Space Without Breaking the Bank
You’ve just discovered that stunning, designer-looking wall decor isn’t reserved for those with unlimited budgets or professional interior designers on speed dial. With creativity, strategic planning, and your local Dollar Tree, you can create spaces that rival magazine spreads—all for the cost of a few lattes.
The beauty of these Dollar Tree wall decor ideas is their flexibility. Start small with a single project that excites you most. Maybe it’s a simple gallery wall in your entryway or a botanical frame series in your bedroom. As you gain confidence and see the transformative results, you’ll naturally expand to other rooms and more ambitious projects.
Remember, every designer showcase you admire on Instagram started with a vision and a plan. Your vision doesn’t require a luxury budget—just enthusiasm, creativity, and the willingness to see potential in unexpected places.check out these 10 Dollar Tree DIY home decor projects that will transform every room in your home.
Which 15+ stunning Dollar Tree wall decor idea will you try first? Share your creations and tag us on social media—we can’t wait to see how you transform your space! Ready for more budget-friendly home decorating inspiration? Subscribe to our newsletter for weekly DIY ideas, shopping tips, and exclusive tutorials delivered straight to your inbox.
Your blank walls are waiting. Armed with these ideas and a $20 bill, you’re about to prove that incredible style is accessible to everyone. Happy decorating!
External Links to Trusted Sources
- Better Homes & Gardens –(Authority on home decor and DIY projects)
- HGTV – (Trusted resource for design principles and tutorials)
FAQs
1. How do I make Dollar Tree frames look expensive?
The most important thing is to use color to bring things together. For your gallery wall, use frames that are all black, all white, or all natural wood. Use white poster board from Dollar Tree to make your own matting and borders around prints. Hang frames at the right height for your eyes (57–60 inches to the center) and keep the space between them the same (2–3 inches). These easy tips will make cheap frames look like they were carefully chosen by a professional.
2. Will Dollar Tree Command strips hold wall decor securely?
Yes! Dollar Tree sells Command strips that work just as well as the ones that cost more for light projects. For heavier things like putting up mirrors or several frames, use more than one strip or get heavy-duty Command strips from a hardware store. Always follow the weight limits on the packaging. Before you apply, clean the wall with rubbing alcohol and press down hard for 30 seconds. Most Dollar Tree wall decorations are light enough that regular Command strips can hold them up well.
3. What’s the cheapest Dollar Tree wall decor project for beginners?
The pressed flower frame project is great for people who are just starting out and costs between $1.25 and $3.75. You will need 1 to 3 Dollar Tree frames, fake flowers (with the petals separated), white cardstock for the back, and glue that dries clear. Simply arrange faux flower petals artfully on the cardstock, secure with tiny glue dots, and frame. It takes about 15 minutes per frame, requires no special skills, and creates botanical art that looks like it came from a boutique shop. Start with one frame to build confidence, then create a series of 3-5 for maximum impact.